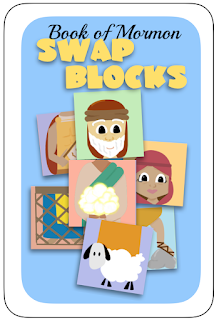
Happy Halloween! Do you have any scary, fun, or just plain good reads? I hope so! Enjoy!
Saturday, October 6, 2012
Tuesday, September 25, 2012
Little Red Riding Hood
I love mini coloring books for many reasons. So I wrote my own version of Little Red Riding Hood along with pictures to color! This time the layouts are a little different and counter-intuitive, and I have two layouts to choose from. The first layout:
You can find the directions for putting it all together on DLTK's website here. They have a ton of stuff to color for every season and holiday you can think of as well as mini books. It's a great website for coloring.
The second layout is for people (like me) who only want to print out one page. While it makes the pictures minuscule, my kids thought they were so fun, and they were thoroughly entertained by them. With this one, I can't get the lines to match up correctly. So, just ignore them and follow the directions here.
Enjoy!
Tuesday, July 31, 2012
Little Boy Blue
Today, I bring to you Mother Goose! Well, Little Boy Blue. Use it as you wish, a coloring page, felties, magnets, whatever. Just enjoy!
Friday, July 27, 2012
ABC Pages
I'm back! Sorry it has taken so long, but I had a baby. And I couldn't help but to snuggle him. All the time. Anyway, I think I can start to pull myself away every once in a while to do more updates :) So, here we go! I know I've had some ABC writing pages up for a while, but not the whole alphabet. I finally finished it. I will post them all on the "ABC Pages" page. You can get to them by clicking the link under my crayon picture or by clicking here!
The pages look something like this:
I tried to make them a little silly because it's fun, and it sparks great conversation. So, there you have it. Enjoy!
The pages look something like this:
I tried to make them a little silly because it's fun, and it sparks great conversation. So, there you have it. Enjoy!
Saturday, November 26, 2011
Star Tree Topper
This is a little off topic and unusual for me, but I thought I'd post it anyway. When we started putting up our Christmas stuff, I didn't like the bow I usually put on top. So, I decided we should make our own star. I went to Google, and found one that I wanted, but I couldn't find directions on how to make it. So, here is what I came up with:
Here are my templates:

Directions:
1. Cut out templates on whatever paper you want. (I suggest card stock, but I used plain paper with music printed on the inside, and it worked fine.) You should have 12 small shapes and 6 large.
2. The straight edge being the bottom, bring the two bottom corners together, and tape them in the center overlapping about a quarter of an inch making a point at the bottom. (How many times can I say "bottom" in once sentence?)
3. Repeat for all shapes.
4. Take 6 of the small cones you just made, and glue sides together, matching up side points and bottom points. It should look like this:
5. Brush glue all over the front of the center piece you just made making sure to cover everything.
6. Sprinkle sparkles. (I let it dry and then did an extra layer of sparkles just to make sure everything was covered.)
7. Brush glue all over the front and sides of all the other cones and roll in sparkles. (These I only did once since rolling them helps the sparkles stick and ensures the sparkles are everywhere you want them to be.)
8. Let dry.
9. Glue larger cone 1/4-1/2 inch inside each of the center cones. Let dry.
10. Glue the rest of the smaller cones 1/4-1/2 inch inside each of the large cones. Let dry.
11. Glue or tape a paper loop on the back of your star and place on tree. (Or you can just try to stick it up there without anything like we did. I might go back and put a loop on later.)
Hopefully, if I've explained everything correctly, it should look like this:
It would look much better with a loop on the back holding it on. Just sayin'. Anyway, enjoy!
Wednesday, November 2, 2011
Five Little Turkeys
Yea for Thanksgiving! I thought I'd try my hand at making a little coloring book/story book to the poem "Five Little Turkeys". So, here it is, I hope you like it! I'm also trying new software so bear with me while I figure it out. Just print the pages, cut on the dotted line, and staple together (don't be fooled by the numbers. They actually go backwards). It means there is only one side of the page, but it keeps it simple. Enjoy!
Make sure you download the pictures instead of printing directly from the blog, so it sizes correctly!
Friday, October 28, 2011
Blank Writing Page
I know this is lame, but it's something for now. Hopefully, I'll get some Thanksgiving things to post soon. Anyway, I started a book club with my five year old, and we write/present narration pages for an activity. I couldn't find any writing pages I liked, and figured it would take me less time to make one than find one. I could be completely wrong, but here it is with a space on the top to draw. So, bust out your crayons and enjoy!
Subscribe to:
Posts (Atom)


